
In this article, we will learn about:
- Client Side Validations
We have discussed server-side form validations in the last article. Do check it out.
Hooking up Client Side Validations
jQuery’s validate and validate unobtrusive libraries help in achieving client-side validations in .NET MVC apps.
These 2 libraries are included in the .NET 6 MVC template by default.

The MVC template makes it quite easy to refer to these 2 libraries, as there exists a partial view in which these 2 files are referenced.
The partial view is known as – _ValidationScriptsPartial.cshtml
This view is available in the Shared directory of the Views folder.

The content is:
<script src="~/lib/jquery-validation/dist/jquery.validate.min.js"></script>
<script src="~/lib/jquery-validation-unobtrusive/jquery.validate.unobtrusive.min.js"></script>
Let us reference this partial view in the Add Product form and try to understand the client-side validation nature and approach.
@model AddProductViewModel
@{
    Layout = "_Layout";
}

<form method="post">
    <div class="mb-3">
        <label for="productName">Product Name</label>
        <input type="text" class="form-control" placeholder="Enter Product Name" asp-for="ProductName">
        <span asp-validation-for="ProductName" class="text-danger"></span>
    </div>
    <div class="mb-3">
        <label for="productCategory">Product Category</label>
        <select class="form-control" placeholder="Select Product Category" asp-for="ProductCategory"
                asp-items="Html.GetEnumSelectList<Enumerations.ProductCategory>()">
            <option value="">Please Select</option>
        </select>
        <span asp-validation-for="ProductCategory" class="text-danger"></span>
    </div>
    <div class="mb-3">
        <label for="productPrice">Product Price</label>
        <input type="text" class="form-control" placeholder="Enter Product Price" asp-for="Price">
        <span asp-validation-for="Price" class="text-danger"></span>
    </div>
    <div class="mb-3">
        <label for="productPrice">Imported Date</label>
        <input type="date" class="form-control" placeholder="Select Imported Date" asp-for="ImportedDate">
        <span asp-validation-for="ImportedDate" class="text-danger"></span>
    </div>
    <input type="submit" class="btn btn-primary" value="Submit" />
</form>

@section Scripts{
    <partial name="_ValidationScriptsPartial" />
}
We have added the partial view in the @section Scripts using the partial tag helper.
Let us run the app and see the behavior.

When we click the Submit button, we see the validations on the form, but there is no network call to the POST method, which proves that the server-side validations have not come yet into the picture and the client-side validations are working.
We can provide a product name, or select a product category and we would see that the validations disappear instantly and vice versa.

Order of jQuery libraries
We need to be very particular about the order of the jQuery libraries to achieve perfect client-side validations.
The order should be:
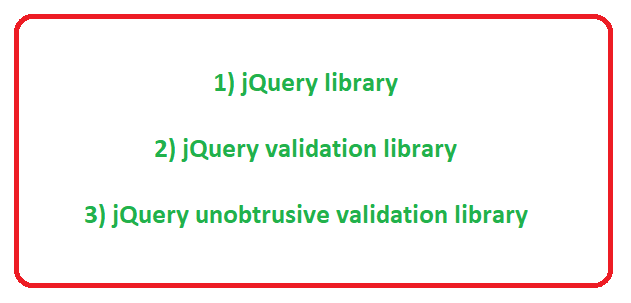

If we mess up the order the client-side validations will not work correctly.
The concept behind client-side validations
Both the jQuery validate and unobtrusive libraries look at the data-* attributes of the HTML elements.
The data-val attribute is the interesting one. The unobtrusive library looks at the data-val attribute and performs client-side validation in the browser when we try to submit the form.
<label for="productName">Product Name</label>
<input type="text" class="form-control" placeholder="Enter Product Name" data-val="true" data-val-required="Product Name can not be empty." id="ProductName" name="ProductName" value="">
<span class="text-danger field-validation-valid" data-valmsg-for="ProductName" data-valmsg-replace="true"></span>
Use both client and server-side validation
We should always hook up both types of validations in a web app.
Client Side validations will restrict the user on the browser itself and will not make a network call.
Server-side validations ensure there’s an added layer of validation security if in any case, the client-side validation fails to work.
Github Link
The updated code is available here.
Conclusion
We have discussed client-side validations in detail in .NET 6 MVC.
We will have a look at the IValidatableObject Interface in the next article to hook up custom validations.
Stay tuned for the next article.
Pingback: .NET 6 MVC Series - Article 6 - IValidatableObject Interface - TechnCode Tools